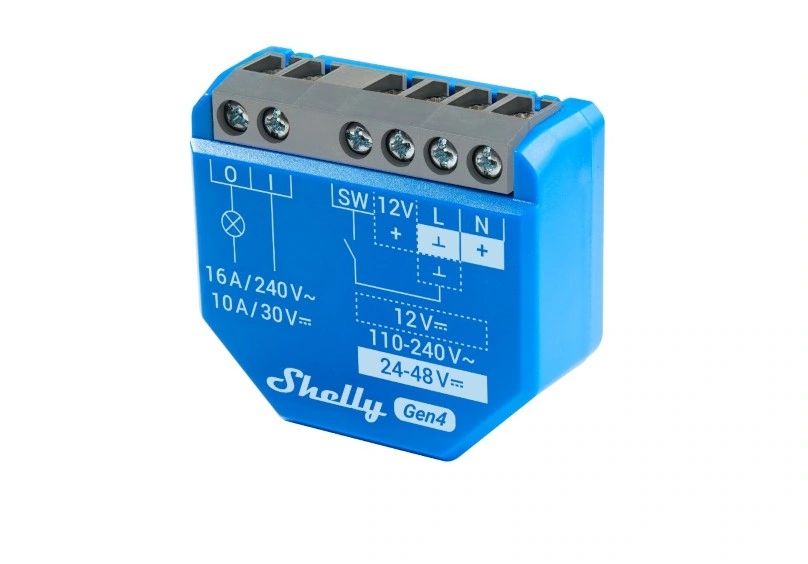
I just bought 2 of these new units, to control the built-in light in my bathroom mirror and the built-in light in the upper cabinets in the kitchen.
In my project where I replaced my old fashioned light switches with smart Lightbee switches, I ran into 2 situations where the Lightbee switches wasn’t enough, and more hardware was required.
It was the light built-in to my bathroom mirror, and the built-in light in the upper cabinets in the kitchen.
Shelly is my go to when it comes to wireless relays, so I ordered 2 Shelly 1PM Mini Gen3 right away.
I ordered the mini version because Danish electric installations are smaller than most, and the space is tight even before I install the wireless relay.
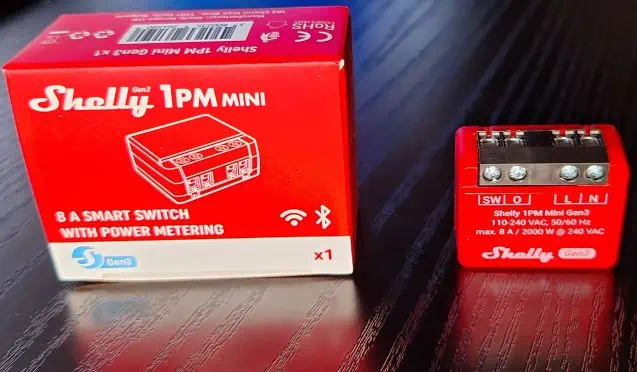
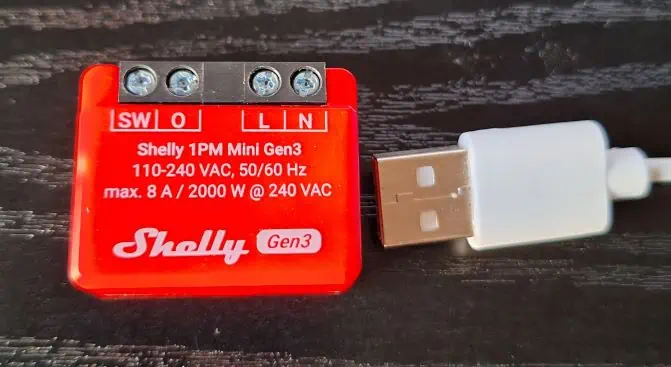
A photo of the package and the relay, and a photo of the relay next to a USB-A plug, so you can see how small it is.
With only 4 connectors, it’s not possible to distribute L and N via the relay, like it is on the normal sized Shelly device.
So some kind of external cable joint is needed for most applications, and in my case it made the installation a little trickier, but in my book it’s a good tradeoff for a smaller device.
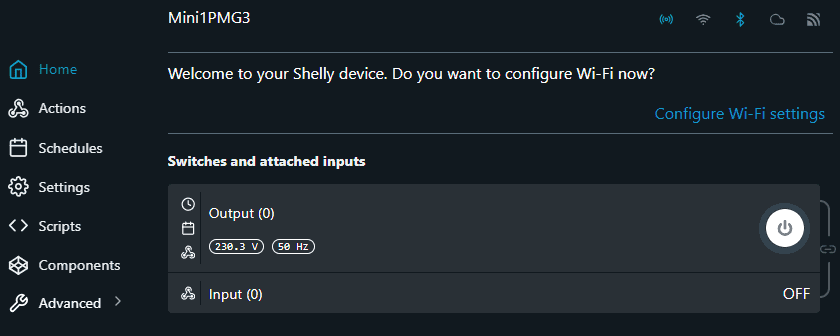
When you connect it to power, it will broadcast it’s own wifi. Connect to it.
Access the embedded web server by accessing http://192.168.33.1/
Their is a lot of ways to configure a Shelly device, so I won’t tell you which way is the right or the wrong way, I will just show you how I configure mine.
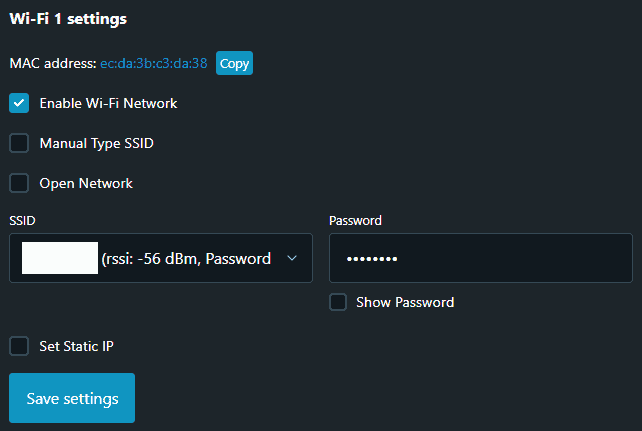
First configure Wifi settings.
Tick “Enable Wifi Network”
Choose your wifi under SSID.
Type your Wifi password.
I suggest that you either set a static IP or make a DHCP reservation in your router, so the device will always have the same IP.
Click “Save Settings”, and check the Wifi icon in the top turns blue.
At this point you should update the firmware. Go to Settings, Firmware, update to latest stable version.
Next step for me is to disable the built-in Access Point. Make sure you connect to the device via your own Wifi before you disable this.
If you leave this enabled for all your Shelly device you will see a lot of wifi in your area, and you will decrease the performance of your own Wifi.
And if you leave it enabled, everyone can login when in range of it, so I highly recommend you disable this after initial configuration.
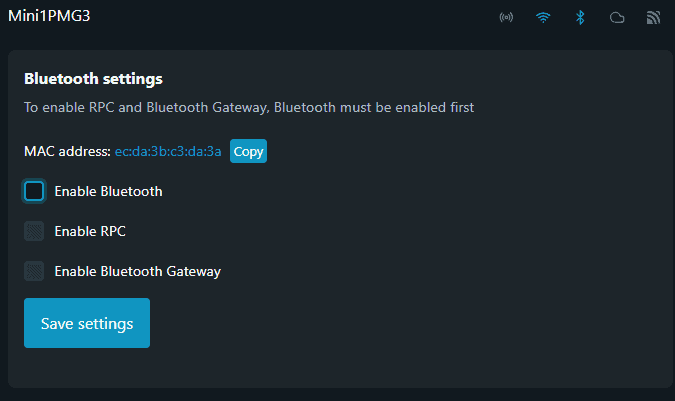
Next step is to disable Bluetooth. There is no reason for me to keep it enabled.
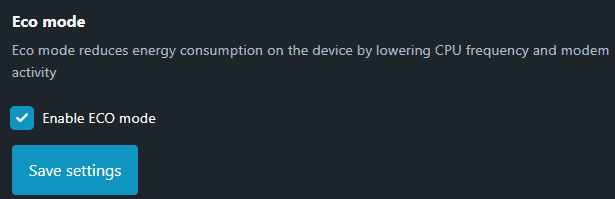
Last step for me it to enable Eco mode.
I don’t use advanced stuff in the Shelly device itself, because I have Home Assistant for that, and I don’t experience latency when I switch it on/off.

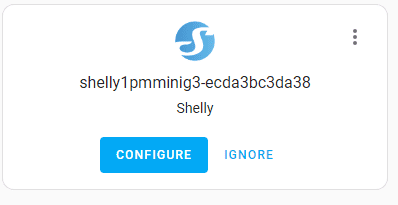
If you go to Devices and Services in Home Assistant, you should see your Shelly device under Discovered.
Click “Configure”, and submit.
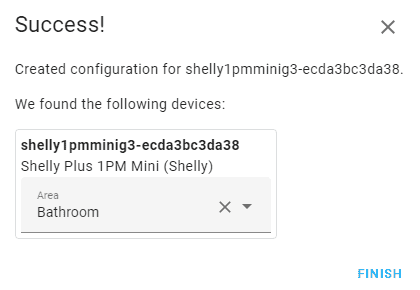
Now you can place it in an area, if you want, and click “Finish”.
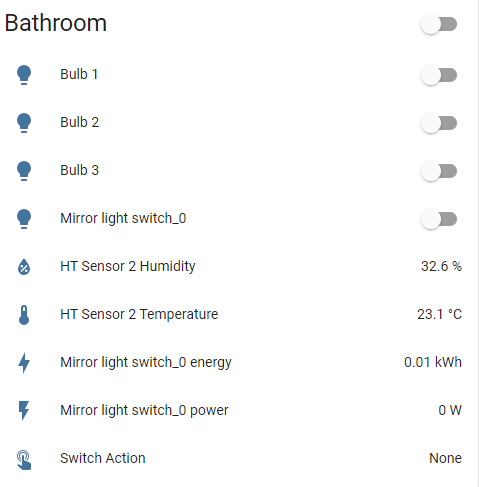
You will get something like this minus the HT sensors and the Bulbs.
Now it’s just a matter of making your automations, and enjoying a reliable smart relay.
Conclusion:
After a week of usage in my bathroom, I am really happy with my new Shelly device. It’s reliable, quick responding, and it fitted perfectly in the wall behind my Lightbee switches. If I had to say something negative about the 1PM mini Gen3, it’s the sound it makes when the relay switch position. It’s notable, even when it’s stuffed in the wall behind a switch, but it doesn’t bother me at all, because the click is instant when I click the button, so it works like an audio feedback that I pressed the button.
The entire setup process is easy and smooth, and don’t require a third party app.
I hope Shelly will make a mini version with O,N,N,L,L configuration, and make the wiring between L and SW internal in the device. It would make it even easier to install because you wouldn’t need external cable joints.
You can buy the Shelly 1PM Mini Gen3 using this Affiliate link.