A year ago I had problems with headaches, especially when working from home, and in weekends. Airthings View Plus helped me understand why.
Random tension headaches are no joke, and while I could still function normal, it’s far from optimal to eat pills several times a week to get rid of the headaches.
I noticed it where a bigger problem in my own home, and better the days I went to work.
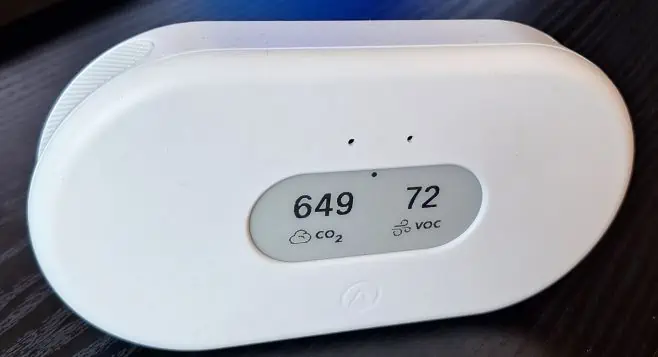
So to figure out what the problem was, I ordered a Airthings View Plus that can measure CO2, VOC, PM 2.5, Radon, Air pressure, Temperature, and Humidity.
I went with this model because it have so many sensors, and I know my area is problematic regarding radon, so I saw this as a great opportunity to measure “everything” with just one device.
It uses 6 AA batteries, and they last about a year in my setup. You can power it via USB-C instead, and that will decrease the reporting interval to a maximum of 5 minutes.
It can stand on a table or be mounted on a wall.
It will display 2 values on the display, and you choose which values in the app. When you wave in front of it, it will show values for readings that are above the recommended.
It also have a red/yellow/green glow indicator to show when air quality is good, fair, or poor.
Use the Airthings app to setup the device. This includes a cloud a account to access history and to integrate to Home Assistant. Go to Home Assistant, add integration, search for Airthings and add it.
Now go Airthings api dashboard and select Integrations from the left side-bar. Click on “Request API Client” in order to set up an API connection for use in Home Assistant, Name your API connection e.g.: “Home Assistant Integration”. Select a Resource Scope, select an access type, i.e., confidential, Select a flow type, Set enable to “on”, and save.
You will now get an ID and secret, use that to add the device in Home Assistant.
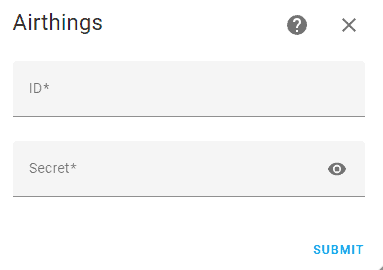
It will give you something like this.
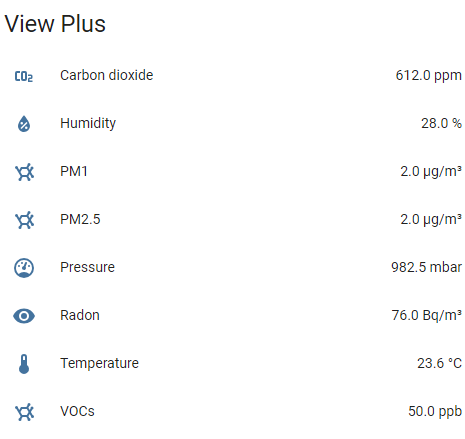
The Airthings view plus started it’s life in my office, when I was working from home. I soon learned that a small room like my office with no ventilation quickly becomes a room with bad air quality if I don’t do something every hour or two.
Next step was moving it to my bedroom, and with the lessen leant from my office, it was no surprise that 8 hours in a closed room was a bad idea. I always closed my door to my bedroom, and left the windows a cm or two open, and it was clearly a mistake and a major cause of my headaches. The CO2 readings would be way above the recommended values even after a few hours, so I slept for many hours in a poor air quality. I fixed the problem by ventilating the entire house before going to bed, and left the door open to the bedroom, so air could ventilate naturally. Now I usually go to sleep with a CO2 value of about 500 ppm and wake up with a CO2 value around 900 ppm.
After fixing my night sleep, I moved the Airthings view plus to my living room, where it have been since. It lets me know when it’s time to open a windows or door, and get some fresh air in, and it’s surprisingly often, if I want all values in “good”.
Conclusion:
Some might argue that this in an expensive device. I will say that the Airthings view plus have a fair price tag, and is an inexpensive device. You get a huge amount of sensors in a single box, even a radon sensor, the app is great, I don’t use it much because I have it in Home Assistant, but it helps you understand the readings and how to improve them. Airthings have a bunch of articles on their website about air quality and how the different readings effect people living in it, and I highly recommend everyone to read them to get a better understanding of air quality.
For me, this have been one of the best purchases I have ever made. Ask yourself how many headaches or other heath improvements, it takes to cover the cost. Very few right? I went from a headache every week, to one every quarter, and that is properly more normal.
In my opinion people should know more about air quality, and how it affect them, and I think this will become a hot topic in the coming decade. I honestly think everyone should have an air quality sensor in their home, to improve life quality.
You can buy the Airthings View Plus using this Affiliate link, and you can check out my review of the AirGradient ONE here.
This was made and tested on Home Assistant version 2024.1.5 and this article is NOT sponsored in any way.

