I wanted some basic monitoring of my Windows Servers in Home Assistant. Let me show you how I accomplished that.
Monitoring of Windows can be done in so many different ways. I searched the web, and found a solution that was easy to install and suit my needs just fine.
CPU and memory use is not really important to me, but disk space is. Running out of disk space is a common problem, and can be due to many reasons, many people blame Microsoft for this, but I like to think the problem is always with the person who setup the system, or an application going crazy.
I went with HASS.Agent, but the newest version didn’t work on my Windows Server 2016, even though I installed the required .NET 6. I then tried installing version 1.37 which only requires .NET 4.8 and that worked right out of the box. HASS.Agent can do much more than I need, but I only enabled the sensors during installation.
You need to install the HASS.Agent integration using HACS in Home Assistant before you can connect.
It’s easy to make the initial setup of the agent, just follow the official documentation.
I did not tick the box to run the agent at login, since this is a server. After installation and configuration was complete, I ran it as a service using NSSM instead.
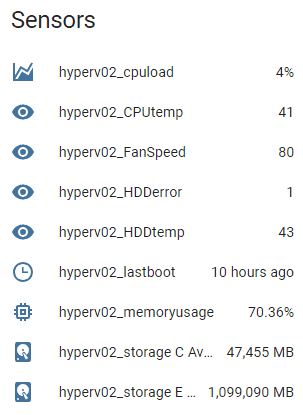
Besides CPU, memory, and disk space, I have also used the built-in sensor for last boot, since it’s nice to know if your server had an unexpected reboot.
In the more advanced part, I have created my own sensors using the WMI sensor, so I have fan speed, CPU temperature, hard drive temperature, and hard drive errors. The data from the last 4 sensors are generated using PowerShell, and saved in WMI for the Hass Agent to pickup.
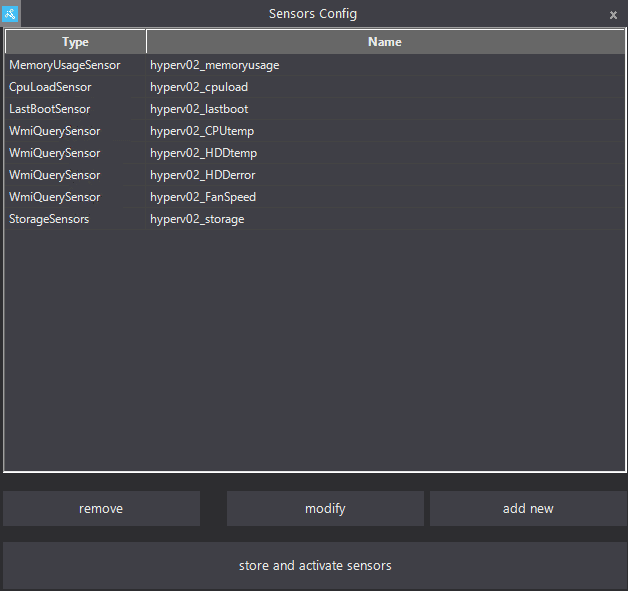
I have set the update interval of all my sensors to 180 sec, since I won’t built a pretty dashboard and use it for real-time monitoring anyway.
Most stuff on my servers are quite static, so snappy updates just put unneeded load on both ends, and don’t provide any value.
The only sensors I really need is the disk sensors, everything else is there just because I can.
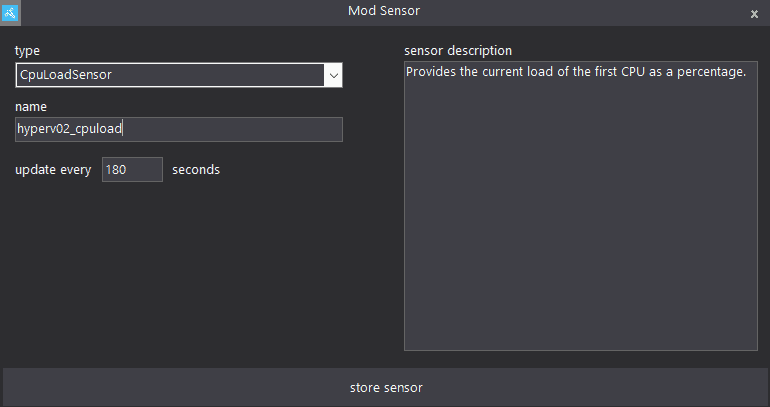
If you are an advanced user and would like to store and grab data in WMI yourself, you can create new variables in the Win32 Environment class, and use the HASS.Agent go grab data using the WMI sensor and a query like this: SELECT VariableValue FROM Win32_Environment WHERE Name='CPUTemp'
I have a PowerShell script running to grab temperature from the Supermicro IPMI and from the physical drives and set the fan speed accordingly. It was easy for me to extend that script to also write the values in the WMI.
This is what it looks like in Home Assistant.
I made notifications on the disk sensors, so I don’t have to check the status in Home Assistant all the time. It’s nice to get a friendly reminder to free some disk space, before the disk is full, and not after.
I am happy with the results.
I don’t need something fancy, but even if I did, I could easily create a dashboard and clean up the sensor names and formatting. Sometimes you just need to keep simple if that fit your needs.
This was made and tested on Home Assistant version 2024.6.4.


